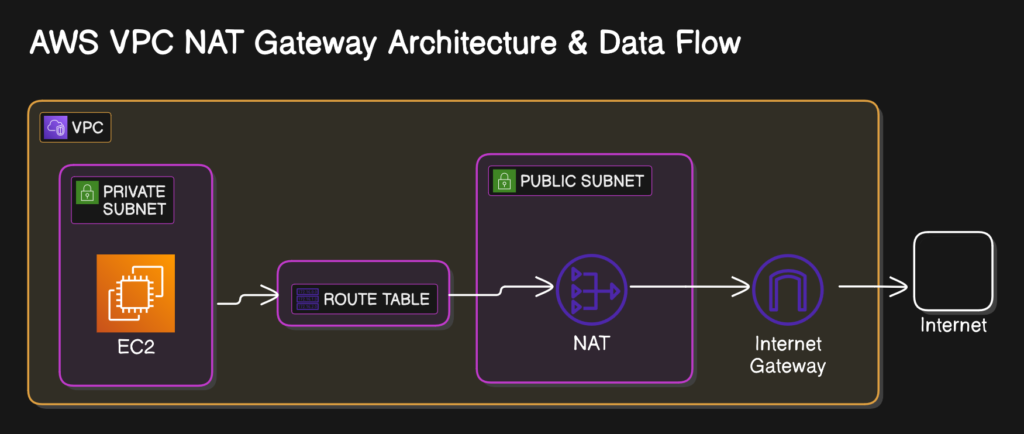
In Amazon Web Services (AWS), instances within a private subnet cannot access the internet directly. However, a NAT (Network Address Translation) Gateway allows these instances to securely send outbound traffic (e.g., downloading updates, accessing APIs) while remaining inaccessible from external sources.
This guide will walk you through the step-by-step process of setting up a NAT Gateway to enable internet access for private subnets in AWS.
Prerequisites
Before proceeding, ensure that you have:
✅ A VPC (Virtual Private Cloud)
✅ At least one public subnet (associated with an Internet Gateway)
✅ At least one private subnet (which requires internet access via NAT)
Step 1: Identify Your VPC & Subnets
Before proceeding, ensure you have:
- A VPC (Virtual Private Cloud).
- At least one public subnet (connected to an Internet Gateway).
- At least one private subnet (which needs internet access via NAT).
How to Check Your Subnets?
- Go to AWS Console → VPC Dashboard → Subnets.
- Identify:
- Public Subnet: Within route table, should have 0.0.0.0/0 pointing to an Internet Gateway (IGW).
- Private Subnet: Within route table, should have 0.0.0.0/0 pointing to a NAT Gateway (if already set up).
Step 2: Create an Internet Gateway
A NAT Gateway must be in a public subnet, which requires an Internet Gateway (IGW).
- Go to VPC Dashboard → Internet Gateways.
- Click Create Internet Gateway.
- Name it (e.g., MyVPC-IGW) and click Create.
- Attach it to your VPC:
- Select the new Internet Gateway.
- Click Actions → Attach to VPC → Select your VPC → Attach.
Step 3: Create a NAT Gateway
Now, we’ll create a NAT Gateway in a public subnet.
- Go to VPC Dashboard → NAT Gateways.
- Click Create NAT Gateway.
- Select a public subnet.
- Click Allocate Elastic IP → Create NAT Gateway.
Step 4: Update the Route Table for Private Subnet
- Go to VPC Dashboard → Route Tables.
- Select the Route Table associated with your private subnet.
Click Edit Routes → Add Route:
Destination: 0.0.0.0/0
Target: nat-xxxxxxxx (Select the NAT Gateway)
- Click Save Changes.
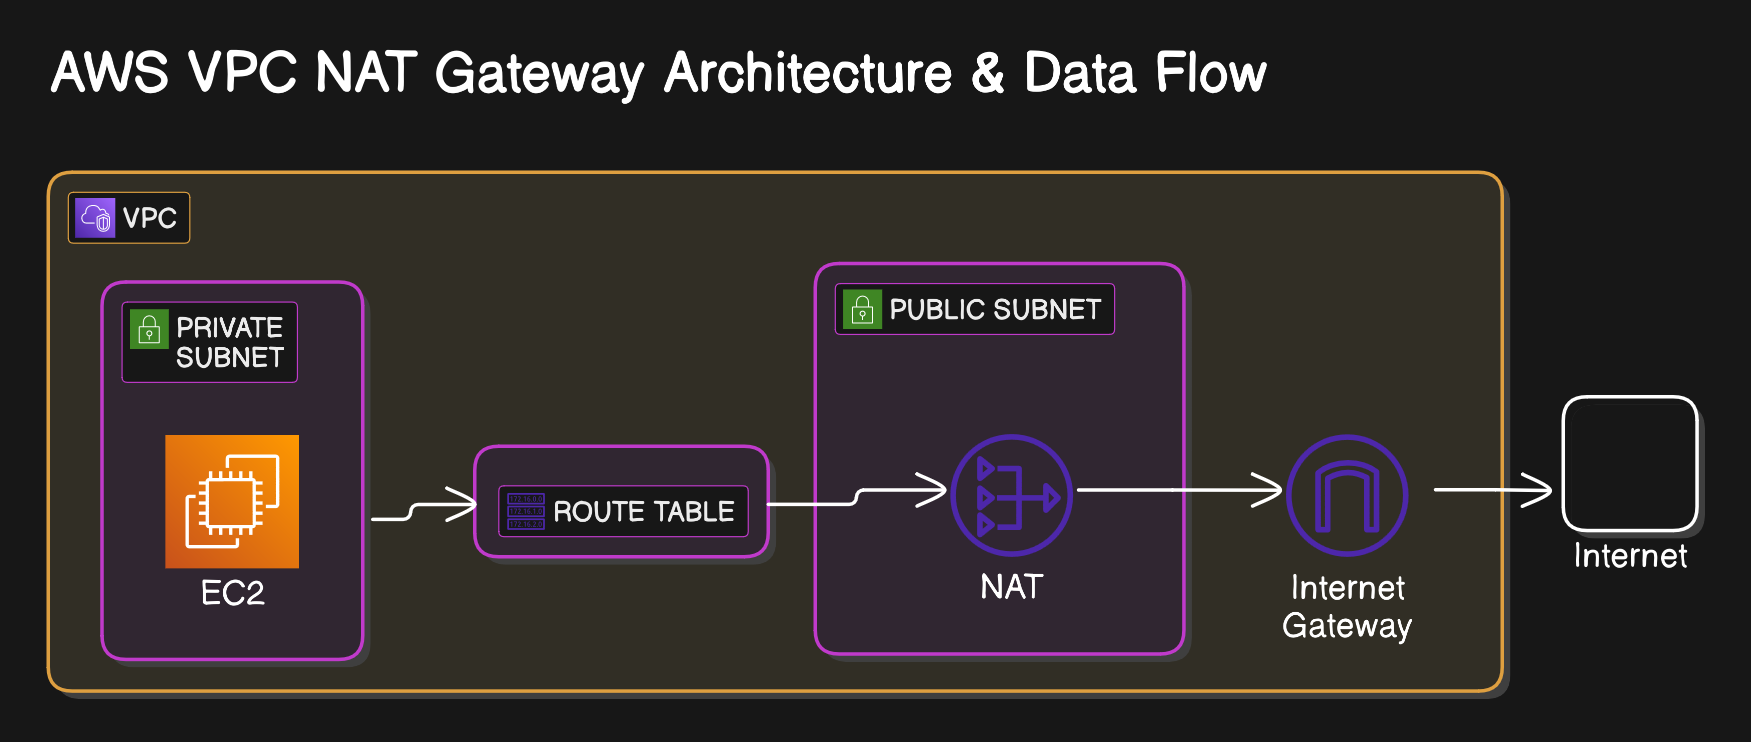
Final private subnet and route table and nat gateway looklike below all within VPC
Step 5: Test Connectivity
- Launch an EC2 instance in the private subnet.
- Connect via SSH using a Bastion Host or Session Manager.
ping 8.8.8.8
curl -I http://google.com - If successful, your NAT Gateway is working!
Troubleshooting Tips
- Ping not working? Ensure Security Group allows outbound ICMP.
- Still no internet? Check that the NAT Gateway is in a public subnet with an Elastic IP.
- Check VPC Flow Logs to debug connectivity issues.
Conclusion
By following these steps, you’ve successfully enabled internet access for private subnets using a NAT Gateway in AWS. This setup ensures security while allowing outbound connections for necessary updates and external API access.
🚀 Now your AWS environment is properly configured!


No Comments
Leave a comment Cancel