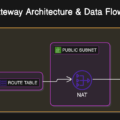
In AWS, providing internet access to EC2 instances in private subnets is a common requirement for secure architectures. While AWS offers the managed NAT Gateway service for this purpose, it comes with a cost—approximately $32/month per gateway plus data transfer fees. For small-scale projects, startups, or cost-conscious developers, this can add up quickly. Fortunately, you can configure an EC2 instance as a NAT to achieve the same functionality at a fraction of the cost. In this article, we’ll walk through the setup process, highlight cost-saving benefits, and compare it to the native NAT Gateway service.
Why Use an EC2 Instance as a NAT?
A Network Address Translation (NAT) device allows instances in a private subnet to access the internet (e.g., for software updates or API calls) without exposing them to inbound traffic. The AWS NAT Gateway is a fully managed, highly available solution, but its pricing—$0.045/hour (around $32/month) plus $0.045/GB of data processed—may not suit every budget.
By contrast, a small EC2 instance (e.g., t2.micro or t3.nano) can serve as a NAT, costing as little as $0/month (under the AWS Free Tier) or $3–$7/month otherwise. This approach trades some management overhead for significant savings, making it ideal for development environments, low-traffic workloads, or cost-optimization experiments.
Prerequisites
Before diving in, ensure you have:
- A VPC with a public subnet (e.g., 10.0.0.0/24) and a private subnet (e.g., 10.0.1.0/24).
- An Internet Gateway attached to the VPC.
- An EC2 instance in the private subnet needing internet access.
- An SSH key pair for instance management.
Step-by-Step Configuration
Here’s how to set up an EC2 instance as a NAT using Ubuntu 24.04 LTS in the public subnet:
1. Launch the NAT EC2 Instance
- AMI: Choose Ubuntu Server 24.04 LTS (or Amazon Linux 2023 for a lightweight alternative).
- Instance Type: Opt for t3.nano (
$0.0052/hour) or t2.micro ($0.0104/hour). The t2.micro is free for 750 hours/month under the AWS Free Tier. - Network: Place it in the public subnet and enable “Auto-assign Public IP.”
- Security Group:
- Inbound: Allow SSH (port 22) from your IP and all traffic from the private subnet CIDR (e.g., 10.0.1.0/24).
- Outbound: Allow all traffic (0.0.0.0/0).
2. Disable Source/Destination Checks
- In the AWS EC2 console, select the NAT instance.
- Go to Actions > Networking > Change Source/Destination Check and disable it. This allows the instance to route traffic not destined for itself.
3. Configure IP Forwarding and NAT
SSH into the NAT instance (ssh -i your-key.pem ubuntu@<public-ip>) and run these commands:
# Update the system
sudo apt update && sudo apt upgrade -y

# Enable IP forwarding
sudo sysctl -w net.ipv4.ip_forward=1
echo "net.ipv4.ip_forward=1" | sudo tee -a /etc/sysctl.conf

# Configure NAT (replace 'enX0' with your interface from 'ip link')
sudo iptables -t nat -A POSTROUTING -s 10.0.1.0/24 -o enX0 -j MASQUERADE

# Save rules
sudo iptables-save | sudo tee /etc/iptables/rules.v4
- Check your interface name with ip link (e.g., enX0 or ens5) and replace it in the NAT rule.
4. Update the Private Subnet Route Table
- In the VPC console, go to Route Tables.
- Edit the route table for the private subnet (e.g., 10.0.1.0/24).
- Add a route:
- Destination: 0.0.0.0/0
- Target: Select the NAT EC2 instance (by instance ID, e.g., i-xxxxxxx).
5. Test the Setup
- Access the private subnet EC2 (e.g., via a bastion host or AWS Systems Manager Session Manager).
- Run: bashCollapseWrapCopy
ping 8.8.8.8If you get responses, the NAT instance is successfully routing traffic to the internet.
Cost Comparison: EC2 NAT vs. NAT Gateway
| Option | Cost per Month | Pros | Cons |
|---|---|---|---|
| NAT Gateway | ~$32 + $0.045/GB processed | Managed, highly available | Expensive for low traffic |
| t2.micro NAT | $0 (Free Tier) or ~$7 | Free or low cost, customizable | Manual setup, single point of failure |
| t3.nano NAT | ~$3.80 | Cheapest paid option, sufficient for light use | Limited capacity, manual management |
- Savings Example: For a private subnet transferring 10 GB/month:
- NAT Gateway: $32 + (10 × $0.045) = $32.45
- t2.micro: $0 (Free Tier) or $7.60
- t3.nano: $3.80
- Savings: Up to 88% with t3.nano!
NAT Gateway vs. EC2 NAT: When to Choose What?
- Use NAT Gateway:
- Production workloads needing high availability and zero maintenance.
- Heavy traffic (e.g., >100 GB/month), where EC2 scaling becomes complex.
- Use EC2 NAT:
- Development, testing, or low-traffic environments.
- Budget-conscious projects leveraging the Free Tier.
- Scenarios requiring custom NAT rules or monitoring.
For a highly available EC2 NAT, you could deploy it in an Auto Scaling Group (min. 1 instance) to recover from failures, though this adds slight complexity.
Best Practices for EC2 NAT
- Monitor Health: Use CloudWatch to track instance status and reboot if needed.
- Optimize Placement: Place the NAT instance and private subnet in the same Availability Zone to avoid inter-AZ data transfer costs ($0.01/GB).
- Secure It: Limit security group rules to essential traffic only.
- CIDR Planning: Ensure your VPC CIDR (e.g., 10.0.0.0/16) and subnets (e.g., 10.0.0.0/24, 10.0.1.0/24) don’t overlap with other VPCs or on-premises networks.
Conclusion
Configuring an EC2 instance as a NAT is a practical, cost-effective alternative to the AWS NAT Gateway. With a t2.micro or t3.nano, you can slash networking costs by 80–100% while meeting the needs of private subnet instances. Though it requires manual setup and lacks the native service’s redundancy, it’s a perfect fit for budget-conscious AWS users. Try it out in your next project, and let me know your experience in the comments!


No Comments
Leave a comment Cancel